How to port Android 4.0.3 Ice Cream Sandwich(ICS) on ODROID-7

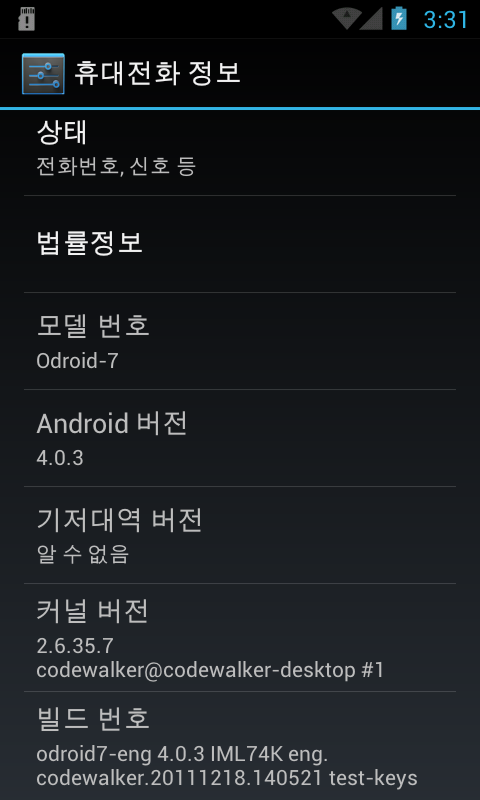
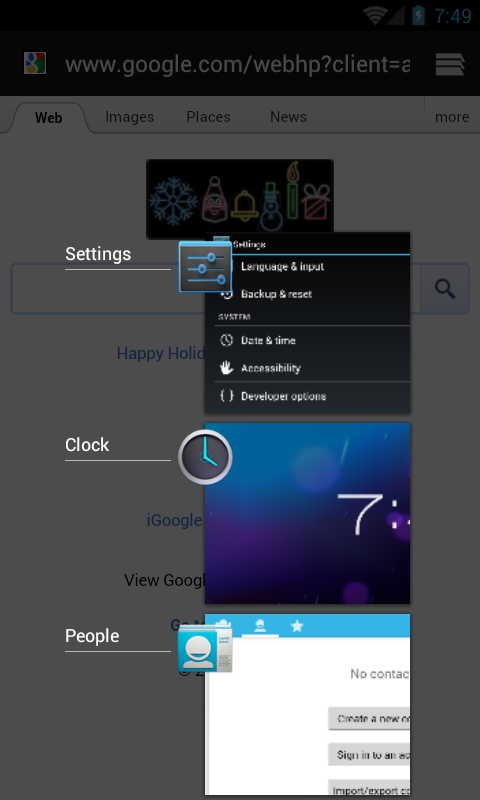
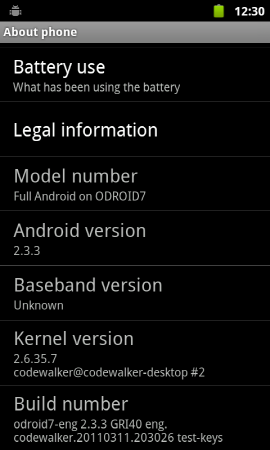
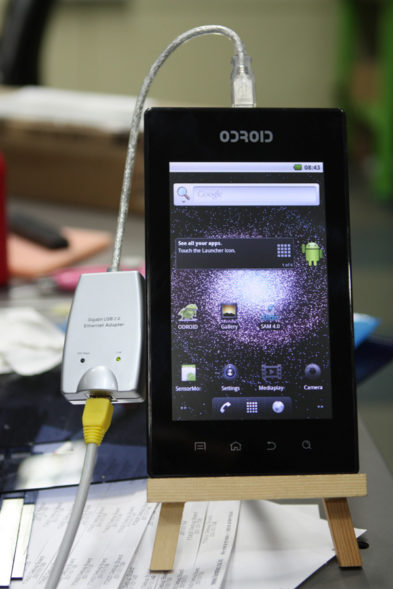
Screenshot of ICS 4.0.3 version information on ODROID-7.

Here is a brief instruction how to port/install the ICS into ODROID-7.
Note, this is a very early version. Unstable and there are many unsupported features.

1. Get the Kernel source code of ODROID-7 (ver 2.6.35)
http://com.odroid.com/sigong/nf_file_board/nfile_board_view.php?keyword=&bid=41

Modify the touch screen driver as below.
kernel/drivers/input/touchscreen/odroid7_MT_touch_portrait.c

169                 input_sync(hkc1xx_touch.driver);
170 
171 //codewalker
172                 input_mt_sync(hkc1xx_touch.driver);
173 
174                 input_sync(hkc1xx_touch.driver);
175 
176 
177 #if defined(DEBUG_HKC1XX_TOUCH_MSG) 
178 printk("%s : Penup event send[x = %d, y = %d]n", __FUNCTION__, hkc1xx_touch.x, hkc1xx_touch.y); 
179 #endif

2. Download GPU device driver source code of Nexus-S from this link.
https://github.com/Kwiboo/kernel_samsung_crespo/tree/master/drivers/gpu
Copy(overwrite) the GPU code to ODROID-7 kernel source and compile it.

3. Get the official Android ICS source code.(android-4.0.3_r1 IML74K)
repo init -u https://android.googlesource.com/platform/manifest -b android-4.0.3_r1
repo sync

4. Get the modified files from below link and overwrite it into /device & /vendor directory of ICS source tree.
http://dl.dropbox.com/u/4485660/ICS.tar.gz
This file contains various patches.

4. Get the modified files from below link and overwrite it into /device & /vendor directory of ICS source tree.
http://dl.dropbox.com/u/4485660/ICS.tar.gz
This file contains various patches.

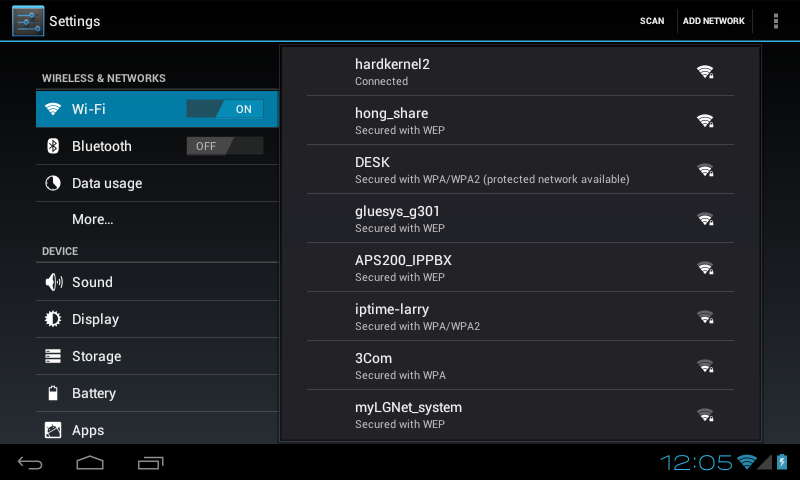
5. Modify WiFi code as below for internet access.

device/hardkernel/odroid7/BoardConfigCommon.mk

71 #WIFI_DRIVER_MODULE_ARG := "firmware_path=/vendor/firmware/fw_bcm4329.bin nvram_path=/vendor/firmware/nvram_net.txt iface_name=wlan" 
72 WIFI_DRIVER_MODULE_ARG := "iface_name=wlan firmware_path=/vendor/firmware/fw_bcm4329.bin nvram_path=/vendor/firmware/nvram" 

And copy the fw_bcm4329.bin & nvram into proper location.
Modify hardware/libhardware_legacy/wifi/wifi.c

#define WIFI_WAKEUP_CTL_FP "/sys/devices/platform/hkc1xx-sysfs/wifi_wakeup" // 1 -> wakeup on 
#define WIFI_REG_CTL_FP "/sys/devices/platform/hkc1xx-sysfs/wifi_reg" // 1 -> reg on 
#define WIFI_RESET_CTL_FP "/sys/devices/platform/hkc1xx-sysfs/wifi_reset" // 1 -> reset on 
int wifi_set_module_status (char *ctl_fp, unsigned char status); 
int wifi_get_module_status (char *ctl_fp); 
static int insmod(const char *filename, const char *args) { 

int wifi_load_driver() { #ifdef WIFI_DRIVER_MODULE_PATH char driver_status[PROPERTY_VALUE_MAX]; int count = 100; /* wait at most 20 seconds for completion */ if (is_wifi_driver_loaded()) { return 0; } // Wifi power control & wakeup enable wifi_set_module_status(WIFI_WAKEUP_CTL_FP, 1); usleep(10000); wifi_set_module_status(WIFI_REG_CTL_FP, 1); usleep(10000); wifi_set_module_status(WIFI_RESET_CTL_FP, 1); sleep(1); sync(); if (insmod(DRIVER_MODULE_PATH, DRIVER_MODULE_ARG) < 0) { LOGE("insmod(DRIVER_MODULE_PATH = %s, DRIVER_MODULE_ARG = %s) FAIL!!!", DRIVER_MODULE_PATH, DRIVER_MODULE_ARG); wifi_set_module_status(WIFI_WAKEUP_CTL_FP, 0); usleep(10000); wifi_set_module_status(WIFI_REG_CTL_FP, 0); usleep(10000); wifi_set_module_status(WIFI_RESET_CTL_FP, 0); sleep(1); sync(); return -1; } if (strcmp(FIRMWARE_LOADER,"") == 0) { int wifi_unload_driver() { usleep(200000); /* allow to finish interface down */ #ifdef WIFI_DRIVER_MODULE_PATH if (rmmod(DRIVER_MODULE_NAME) == 0) { int count = 20; /* wait at most 10 seconds for completion */ while (count-- > 0) { if (!is_wifi_driver_loaded()) break; usleep(500000); } wifi_set_module_status(WIFI_WAKEUP_CTL_FP, 0); usleep(10000); wifi_set_module_status(WIFI_REG_CTL_FP, 0); usleep(10000); wifi_set_module_status(WIFI_RESET_CTL_FP, 0); sleep(1); sync(); usleep(500000); /* allow card removal */ if (count) { return 0; 

int wifi_set_module_status(char *ctl_fp, unsigned char status) { int fd, ret, nwr; char buf[10]; if((fd = open(ctl_fp, O_RDWR)) < 0) { LOGE("%s(%s) : Cannot access "%s"", __FILE__, __FUNCTION__, ctl_fp); return -1; // fd open fail } memset((void *)buf, 0x00, sizeof(buf)); if(status) nwr = sprintf(buf, "%dn", 1); else nwr = sprintf(buf, "%dn", 0); ret = write(fd, buf, nwr); close(fd); if(ret == nwr) { LOGI("%s : write success (on = %d)", ctl_fp, status); return 0; } else { LOGE("%s : write fail (on = %d)", ctl_fp, status); return -1; } } //---------------------------------------------------------------------------------------------------------------- int wifi_get_module_status(char *ctl_fp) { int fd, ret, nrd; char buf[10]; if((fd = open(ctl_fp, O_RDONLY)) < 0) { LOGE("%s(%s) : Cannot access "%s"", __FILE__, __FUNCTION__, ctl_fp); return -1; // fd open fail } memset((void *)buf, 0x00, sizeof(buf)); nrd = read(fd, buf, sizeof(buf)); close(fd); // read ok if(nrd) { if(!strncmp(buf, "1", 1)) { LOGI("%s : status == 1", ctl_fp); return 1; // wakeup } else { LOGI("%s : status == 0", ctl_fp); return 0; // suspend } } LOGI("%s(%s) : module status == unknown", __FILE__, __FUNCTION__); return -1; } //---------------------------------------------------------------------------------------------------------------- int wifi_module_wakeup_status() { int fd, ret, nrd; char buf[10]; if((fd = open(WIFI_WAKEUP_CTL_FP, O_RDONLY)) < 0) { LOGE("%s(%s) : Cannot access "%s"", __FILE__, __FUNCTION__, WIFI_WAKEUP_CTL_FP); return -1; // fd open fail } memset((void *)buf, 0x00, sizeof(buf)); nrd = read(fd, buf, sizeof(buf)); close(fd); // read ok if(nrd) { if(!strncmp(buf, "1", 1)) { LOGI("%s(%s) : module status == wakeup", __FILE__, __FUNCTION__); return 1; // wakeup } else { LOGI("%s(%s) : module status == suspend", __FILE__, __FUNCTION__); return 0; // suspend } } LOGI("%s(%s) : module status == unknown", __FILE__, __FUNCTION__); return -1; } //---------------------------------------------------------------------------------------------------------------- int wifi_module_wait_time(int waitTime) { LOGI("%s(%s) : module wait time = %d sec", __FILE__, __FUNCTION__, waitTime); sleep(waitTime); sync(); return 0; } 
You will have a new libhardware_legacy.so with above modification.
Please note, bcm4329.ko file should be regenerated with “make modules” command of kernel build and copied to ODROID.
6. Let’s start build the ICS
chmod u+x device/hardkerenl/odroid7/build_android.sh
device/hardkerenl/odroid7/build_android.sh
 

7. Install the Android system files and zImage and ramdisk-uboot.img as we do for Gingerbread installation.
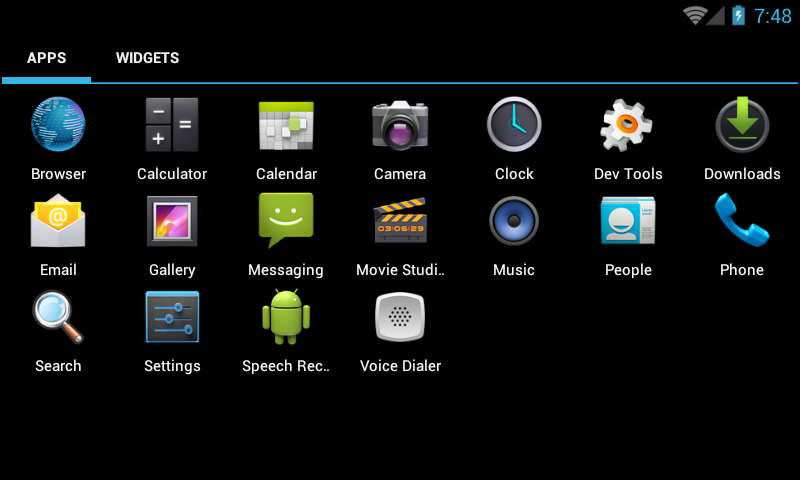
http://dev.odroid.com/projects/odroid-t/Tested features
– LCD driver with 3D accelerator
– Capacitive touch screen
– Sound output
– Sound input (Microphone)
– USB ADB driver
– USB Host HID (Mouse/Keyboard)
– WiFi
– MFC driver for media player
– GPS driver
– Accelerometer sensor
– HOME key function
– Backlight Brightness control
– Battery Gauge / Charger driver

To do list
– Camera
– Bluetooth
– HDMI
– Geo Magnetic Field sensor
– NFC

Update!
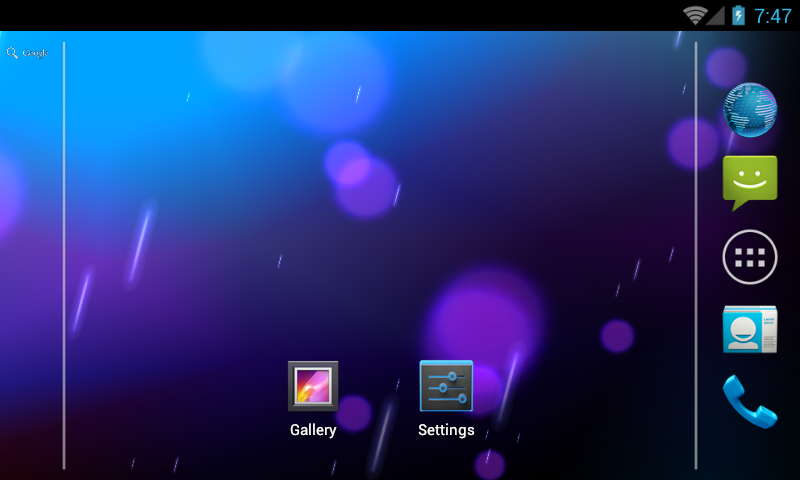
Modified DPI for tablet mode (density=120)
Softkey enabled
Enabled Home screen rotation


Small embedded Linux root file system for ODROID-7/7E

ODROID-7에서 테스트된 리눅스 루트 파일 시스템입니다.
ODROID-E7에도 적용 가능합니다.
Auto-Login을 구현하여, SDL 및 간단한 어플까지 만들어 모두 자동으로 실행하는 실용적인 예제가 될것 같습니다.

How to make a Small embedded Linux root file !

I found a generic embedded root file system with EABI by Googling.
http://ftp.falinux.com/toolchain_ramdisk/recommendation/gcc-4.3.2/
At this moment, this link is broken.

To implement the auto login, I need to cross compile the mingetty in the Sourceforge.
http://sourceforge.net/projects/mingetty/
After compilation, the generated file must be copied in to /bin directory.

Add below line in to /etc/inittab for automatic login as a super user(root)

T0:12345:respawn:/bin/mingetty --autologin=root ttySAC2 115200 vt100

To test this root file system, I copied it to the system partition(mmcblk0p2) of Odroid-7.

And I changed bootargs as below.
For ODROID-7 (S5PC110/EXYNOS-3110)

setenv bootargs 'root=/dev/mmcblk0p2 rw rootfstype=ext4  init=/sbin/init console=ttySAC2,115200 rootdelay=1'
setevn bootcmd 'movi read kernel 30008000;bootm 30008000'
savenv

For ODROID-E7 (S5P6450 ARM11)

setenv bootargs 'root=/dev/mmcblk0p2 rw rootfstype=ext4  init=/sbin/init console=ttySAC2,115200 rootdelay=1'
setevn bootcmd 'movi read kernel E0008000;bootm E0008000'
savenv

To make a SDL and application software, I followed below sequence.

Toolchain
Sourcery G++ Lite 2010.09-50  (GNUEABI version)
https://sourcery.mentor.com/sgpp/portal/release1600
* Note: EABI version can’t compile SDL correctly. Must use the GNUEABI version.

SDL source code
http://www.libsdl.org/download-1.2.php
Source code location on host PC
/home/justin/sdl/SDL-1.2.14 (This is my working directory. It is just an example!)

Compile SDL

export CC=arm-none-linux-gnueabi-gcc
./configure --host=arm-none-linux-gnueabi --prefix=/home/justin/sdl/compiled --without-x
make -j 4
make install

* Note: Modify the SDL-1.2.14/src/video/fbcon/SDL_fbvideo.c
Comment out the mouse related code in FB_VideoInit() function.

Compile sdl test (Modify the SDL init function to 800×480 resolution and 32bit color, if the application uses graphic layer.)

./configure --host=arm-none-linux-gnueabi  --with-sdl-prefix=/home/justin/sdl/compiled --disable-sdltest
make -j 4

Compile Freetype
http://download.savannah.gnu.org/releases/freetype/freetype-2.1.10.tar.gz

./configure --host=arm-none-linux-gnueabi --without-zlib --prefix=/home/justin/sdl/compiled
make -j 4
make install

Compile SDL_ttf to display fonts.
http://www.libsdl.org/projects/SDL_ttf/SDL_ttf-2.0.10.tar.gz

./configure --host=arm-none-linux-gnueabi --prefix=/home/justin/sdl/compiled --with-freetype-prefix=/home/justin/sdl/compiled --with-sdl-prefix=/home/justin/sdl/compiled 

#undef HAVE_ICONV ==> showfont.c ( Modify this to avoid annoying error. But, this one should be fixed for proper display of 2-byte languages.)

make -j 4
make install

showfont executable file is generated in .lib directory.

SDL_ShowCursor(SDL_DISABLE);  //To hide the mouse cursor !!!

Download and Install font.
http://ftp.gnu.org/gnu/freefont/freefont-ttf-20100919.tar.gz
Uncompress and copy the fonts in to /usr/fonts/ directory.

Let’s test.

./showfont -i ../fonts/FreeSerif.ttf 30

To execute this application automatically, add below line in /root/.bashrc !!

/usr/bin/showfont -i /usr/fonts/FreeSerif.ttf 30

Finally we made a simple and useful root file system.
This is very light and fast embedded linux root file system.
Size is 35Mbyte approximately.
Get this root file system from
http://dev.odroid.com/projects/odroid-t/download/note/76

Reference.
http://www.crosscompile.org/static/pages/SDL.html

Oscilloscope on ODROID-7

ODROID-7 has an expansion port of TTA20 connector.
There is an ADC port which is connected to S5PC110 processor.
We are using the ADC port to make a simple oscilloscope.

Please note the ADC sample rate is only 1Mega samples per sec and it causes very low band width.
But, it is still useful to see any moving/static level of signals on GPIO or audio frequency band.

We could grab SINE wave signal as below picture.

Hardware structure.
– One OPAMP for signal conditioning (Attenuation as well as makes high input impedance)
– One LDO for power supply of OPAMP
– One LED can be controlled by CPU to display status
– This board can work with Odroid-T as well.
– TP1 is signal input and TP2 is reference(ground).

This 20pin TTA connector can be attached to ODROID-7 directly or through debug board.

Schematics of OSC board.

Software structure.
– Modified ADC device driver in Kernel
– JNI parts for inter-connection with Java (We call it NDK from time to time)
– Java application to display signals.

What to do….  (Future improvement)
– Trigger function
– Zoom In/Out with multi-touch pinch input
– Better Horizontal/Vertical scaling
– Math lib for FFT/DCT

We will open the source code within couple of weeks.
I think this is a very nice example to learn how real embedded system can run with Android OS.
It also can be a good text book/reference for beginners.

Thanks,

ODROID-7 Gingerbread update

ODROID-7 Gingerbread will be released within couple of weeks.      
Kernel version : 2.6.35.7
Android version : 2.3.3


You can learn more about Android2.3 Gingerbread from Android official site. http://developer.android.com/sdk/android-2.3.html

ODROID-7 Product information is HERE

ODROID-7 Gingerbread test version can be downloaded from here!
http://dev.odroid.com/sigong/nf_file_board/nfile_board.php

초보자를 위한 ODROID-7으로 Android 빌드하기

리눅스를 사용하는 전문 엔지니어들에게는 아주 간단해 보이는 환경설정 과정이 이제 엔지니어의 길을 시작하는 초보자에게는 쉽지 않은 것 같습니다. 더더군다나 Windows7에서 개발환경을 구축하는 문의가 많아 저희가 직접 메뉴얼 비슷하게 작성해 보기로 하였습니다. 안드로이드 환경설정이 쉽지 않으신 분들은 이 과정을 따라해 보시는 것도 좋을 것 같습니다.

       목        차

 1. Oracle VM Virtual Box
1.1. Oracle VM VirtualBox 설치하기
1.2. Virtual Machine 만들기
 2. Installing Ubuntu
2.1. Ubuntu 설치하기
2.2. Ubuntu Update 하기
2.3. Terminal Window 바로가기
2.4. Folder 공유하기
 3. Ubuntu 에서 Java 및 기타 환경 설치하기
 4. ODROID-7 Source code 받기
 5. Windows7 에서 Android SDK 설치하기
   5.1. JDK 설치하기
   5.2. Android SDK 설치하기
   5.3. Path 연결하기
   5.4. ADB USB driver 설치하기
 6. Android Build 하기
   6.1. Confidential file 끄집어내기
   6.2. Android Build 하기
 7. Virtual Box에서 USB Device 연결하기
 8. Android System folder를 ODROID-7 에 전송하기
 9. Virtual Box에서 minicom 연결하기
10. Tool Chain 설치하기
11. Codesourcery 설치하기
12. DNW 실행하기
13. RAM disk image를 ODROID-7 으로 전송하기
14. Kernel build 하기 및 ODROID-7 으로 전송하기
   14.1. Kernel Build 하기
   14.2. Kernel을 ODROID-7 으로 전송하기
15. U-boot build 하기 및 ODROID-7 으로 전송하기
   15.1 U-boot build 하기
   15.2. U-boot를 ODROID-7 으로 전송하기
16. ODROID-7 Recovery image로 복구하기

초보자를 위한 ODROID-7 으로 Android 빌드하기
https://docs.google.com/viewer?a=v&pid=explorer&chrome=true&srcid=1j_7Y6GaqocWX-PXVjThiz38hswpgrsOiUNmFrJx2desFbSlzi9vlWxHz_Gge&hl=en

ODROID-7 update

– External USB Gigabit ethernet support with static IP configuration in setting menu.
(Tested with Axis AX88178 chipset)
– WLAN tethering(portable hotspot) support with USB ethernet.
– Ethernet & Portable hotspot manual ==> Download
– Latest offical Froyo branch Android 2.2.1_r1 FRG83 is merged.
– 3Mpixel camera support.
– Touch screen controller F/W update for stable input again.
– Kernel source fix for the latest Codesocery GCC 4.5.1 (Lite 2010.09-51)

Source code can be downloaded from here.
+ Kernel source
==>
 Download
+ Android source
==> 
Download
+ Recovery image
==> 
Download

* How to update
– Back up the source code and schematics in Micro-SD card first. All contents in the card will be erased.
– Download and uncompress the attached file.
– Power off the Odroid and unplug the Micro-SD card.
– Plug the Micro-SD in to USB Memory card reader and connect to PC.
– Run burning software in Windows OS. (Windows Vista & Windows-7 users must run in compatility mode)
– After writing process, move the Micro-SD card to Odroid and enjoy~

[Korean]

– 외장형 기가비트 USB 이더넷을 지원합니다. 초고속 인터넷 접속이 가능해 졌습니다.
(설정 메뉴에 Static IP 세팅을 구현하였고, Axis사의 AX88178 칩셋이 들어 있는 제품으로 테스트 하였습니다.
같은 칩셋을 사용한 Gigabit USB-LAN 카드가 오픈 마켓에서 3만원 정도에 구입 가능합니다.)
– 유선랜을 이용한 무선랜 테더링를 지원 합니다. 무선 공유기처럼 동작합니다.
– 유선랜과 무선랜 테더링 사용 방법은 아래 링크를 참고하세요. ==> Download
– 최신 Froyo 2.2.1_r1 FRG83을 기반으로 작업하였습니다.
– 3Mpixel 카메라를 추가로 지원하도록 드라이버가 변경되었습니다.
– 터치스크린 펌웨어가 또다시 업데이트되어 입력 감도가 좋아졌습니다.
– 최신 버전 CodeSorcery G++ Lite 2010.09-51 gcc 4.5.1에서 컴파일이 가능하도록 커널 소스 수정