There are updates!
Read below article and jump to here to get the latest version.
http://odroid.foros-phpbb.com/t1171-linux-kernel-36-rc4-runs-ubuntu-1204-on-odroid-x
We’ve just made an initial port of Linux Kernel 3.6-rc1 which can run Ubuntu 12.04 with ODROID-X.
Note that Ubuntu root file system is came from Linaro 12.07 release. User ID and password are “linaro” and “linaro”.
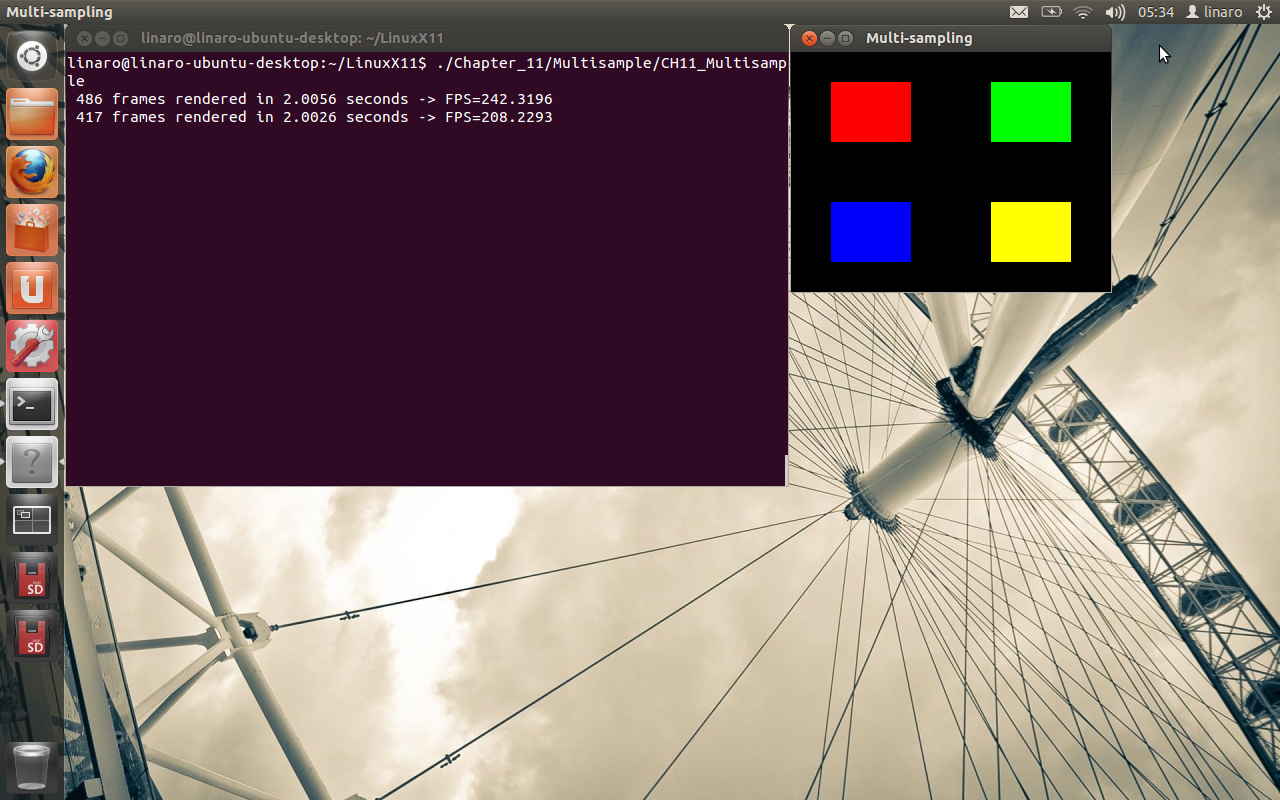
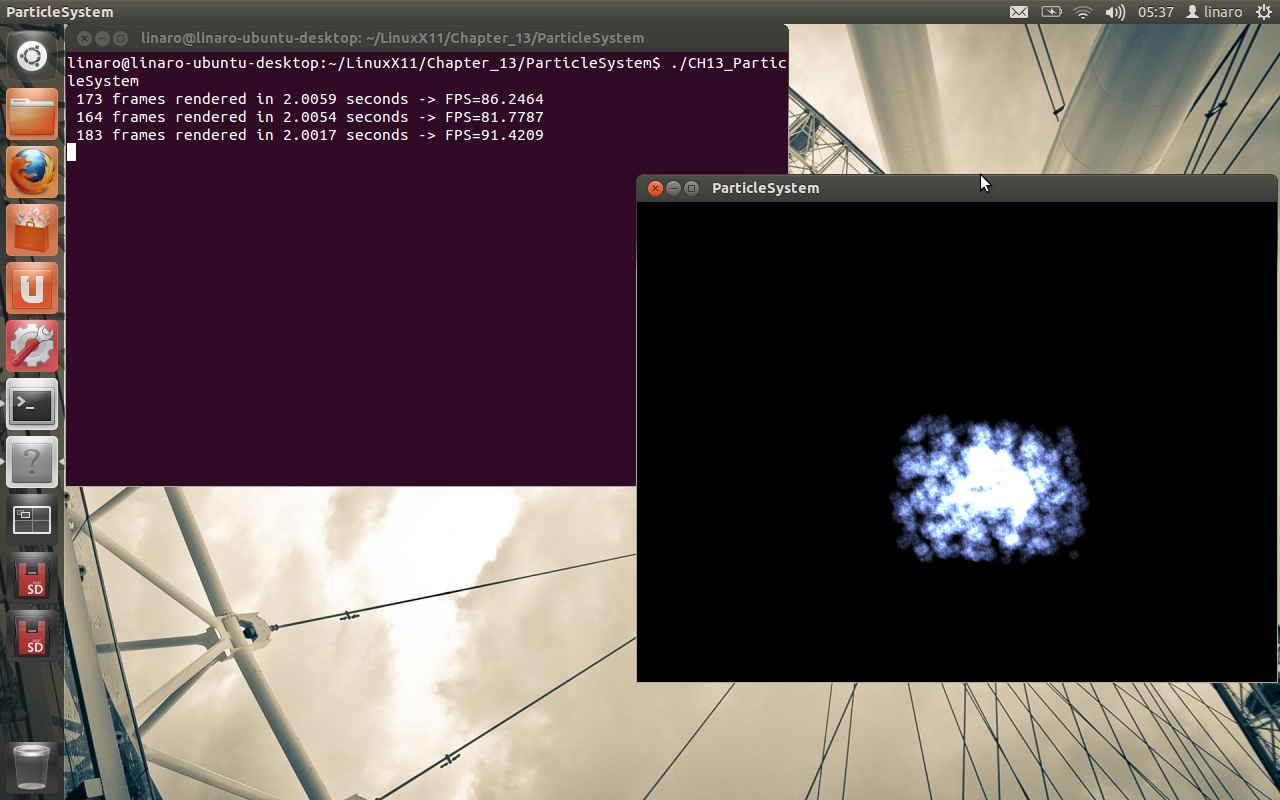
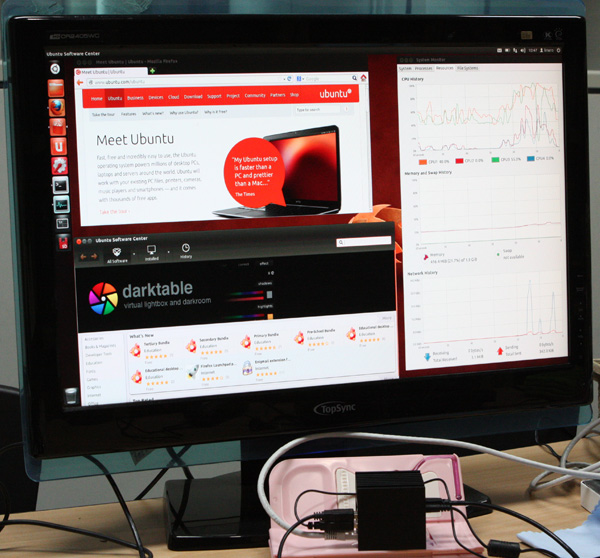
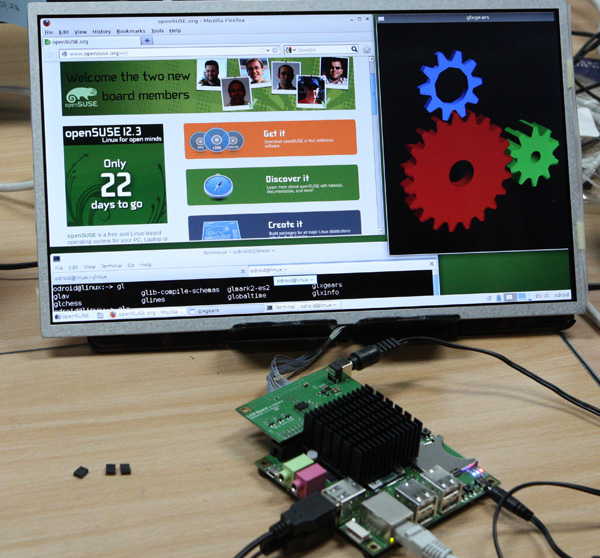
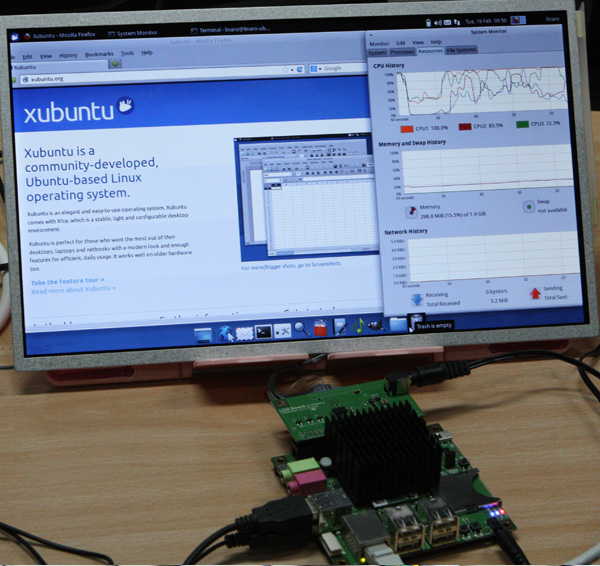
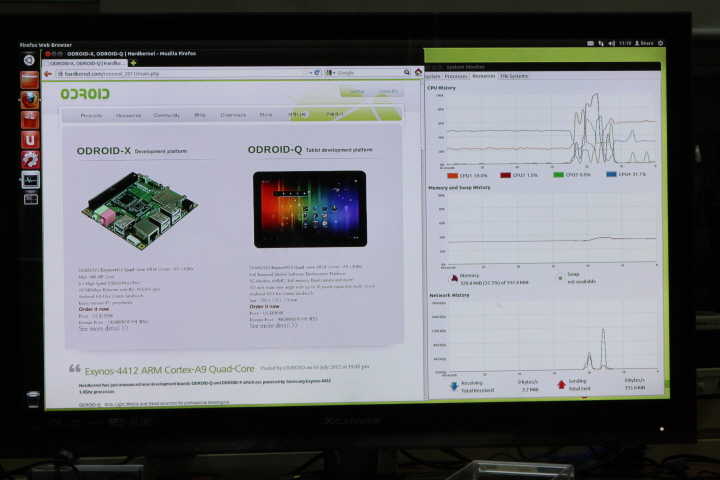
Here are some pictures show it runs Firefox and System-Monitor in Ubuntu.

Ubuntu runs in 1080p mode
This is a full booting log with Ubuntu 12.04. We captured this log with USB-UART kit.
U-Boot 2010.12 (Aug 06 2012 - 11:50:16) for ODROID4412


CPU: S5PC220 [Samsung SOC on SMP Platform Base on ARM CortexA9]
APLL = 1000MHz, MPLL = 800MHz
DRAM:  1023 MiB

PMIC VERSION : 0x00, CHIP REV : 2

BL1 version: N/A (TrustZone Enabled BSP)


Checking Boot Mode ... SDMMC
REVISION: 1.1
MMC Device 0: 7695 MB
[ERROR] response timeout error : 00000104 cmd 1
FAIL: waiting for status update.
MMC Device 1: 0 MB
MMC Device 2 not found
ModeKey Check... run normal_boot
Net:   No ethernet found.
Hit any key to stop autoboot:  0
reading kernel..device 0 Start 1057, Count 16384
MMC read: dev # 0, block # 1057, count 16384 ... 16384 blocks read: OK
completed
Boot with zImage

Starting kernel ...

Uncompressing Linux... done, booting the kernel.
[    0.000000] Booting Linux on physical CPU 0
[    0.000000] Linux version 3.6.0-rc1 (ruppi@ruppi-Virtualbox) (gcc version 4.7.1 (Ubuntu/Linaro 4.7.1-5ubuntu1~ppa1) ) #5 SMP PREEMPT Tue Aug 7 13:39:13 KST 2012
[    0.000000] CPU: ARMv7 Processor [413fc090] revision 0 (ARMv7), cr=10c5387d
[    0.000000] CPU: PIPT / VIPT nonaliasing data cache, VIPT aliasing instruction cache
[    0.000000] Machine: ODROID-X
[    0.000000] cma: CMA: reserved 16 MiB at 6e800000
[    0.000000] Memory policy: ECC disabled, Data cache writealloc
[    0.000000] CPU EXYNOS4412 (id 0xe4412211)
[    0.000000] S3C24XX Clocks, Copyright 2004 Simtec Electronics
[    0.000000] s3c_register_clksrc: clock armclk has no registers set
[    0.000000] EXYNOS4: PLL settings, A=1000000000, M=800000000, E=96000000 V=108000000
[    0.000000] EXYNOS4: ARMCLK=1000000000, DMC=400000000, ACLK200=160000000
[    0.000000] ACLK100=100000000, ACLK160=160000000, ACLK133=133333333
[    0.000000] sclk_pwm: source is ext_xtal (0), rate is 24000000
[    0.000000] sclk_csis: source is xusbxti (1), rate is 1500000
[    0.000000] sclk_csis: source is xusbxti (1), rate is 1500000
[    0.000000] sclk_cam0: source is xusbxti (1), rate is 1500000
[    0.000000] sclk_cam1: source is xusbxti (1), rate is 1500000
[    0.000000] sclk_fimc: source is xusbxti (1), rate is 1500000
[    0.000000] sclk_fimc: source is xusbxti (1), rate is 1500000
[    0.000000] sclk_fimc: source is xusbxti (1), rate is 1500000
[    0.000000] sclk_fimc: source is xusbxti (1), rate is 1500000
[    0.000000] sclk_fimd: source is mout_mpll_user (6), rate is 50000000
[    0.000000] sclk_mfc: source is mout_mfc0 (0), rate is 50000000
[    0.000000] PERCPU: Embedded 7 pages/cpu @c0d65000 s7232 r8192 d13248 u32768
[    0.000000] Built 1 zonelists in Zone order, mobility grouping on.  Total pages: 255746
[    0.000000] Kernel command line: root=/dev/mmcblk0p3 rw rootfstype=ext4 init=/sbin/init console=ttySAC1,115200 console=tty1 rootdelay=2
[    0.000000] PID hash table entries: 4096 (order: 2, 16384 bytes)
[    0.000000] Dentry cache hash table entries: 131072 (order: 7, 524288 bytes)
[    0.000000] Inode-cache hash table entries: 65536 (order: 6, 262144 bytes)
[    0.000000] Memory: 48MB 216MB 743MB = 1007MB total
[    0.000000] Memory: 1000072k/1016456k available, 31096k reserved, 269312K highmem
[    0.000000] Virtual kernel memory layout:
[    0.000000]     vector  : 0xffff0000 - 0xffff1000   (   4 kB)
[    0.000000]     fixmap  : 0xfff00000 - 0xfffe0000   ( 896 kB)
[    0.000000]     vmalloc : 0xf0000000 - 0xff000000   ( 240 MB)
[    0.000000]     lowmem  : 0xc0000000 - 0xef800000   ( 760 MB)
[    0.000000]     pkmap   : 0xbfe00000 - 0xc0000000   (   2 MB)
[    0.000000]     modules : 0xbf000000 - 0xbfe00000   (  14 MB)
[    0.000000]       .text : 0xc0008000 - 0xc04a453c   (4722 kB)
[    0.000000]       .init : 0xc04a5000 - 0xc04ccc40   ( 160 kB)
[    0.000000]       .data : 0xc04ce000 - 0xc051e640   ( 322 kB)
[    0.000000]        .bss : 0xc051e664 - 0xc05577f0   ( 229 kB)
[    0.000000] SLUB: Genslabs=11, HWalign=64, Order=0-3, MinObjects=0, CPUs=4, Nodes=1
[    0.000000] Preemptible hierarchical RCU implementation.
[    0.000000] NR_IRQS:549
[    0.000000] sched_clock: 32 bits at 200 Hz, resolution 5000000ns, wraps every 4294967291ms
[    0.000000] Console: colour dummy device 80x30
[    0.000000] console [tty1] enabled
[    0.045000] Calibrating delay loop... 1992.29 BogoMIPS (lpj=4980736)
[    0.045000] pid_max: default: 32768 minimum: 301
[    0.045000] Mount-cache hash table entries: 512
[    0.045000] CPU: Testing write buffer coherency: ok
[    0.045000] CPU0: thread -1, cpu 0, socket 10, mpidr 80000a00
[    0.045000] hw perfevents: enabled with ARMv7 Cortex-A9 PMU driver, 7 counters available
[    0.045000] Setting up static identity map for 0x4036fdd8 - 0x4036fe30
[    0.045000] L310 cache controller enabled
[    0.045000] l2x0: 16 ways, CACHE_ID 0x4100c4c8, AUX_CTRL 0x7e470001, Cache size: 1048576 B
[    0.070000] CPU1: Booted secondary processor
[    0.090000] CPU1: thread -1, cpu 1, socket 10, mpidr 80000a01
[    0.090000] CPU1: Unknown IPI message 0x1
[    0.100000] CPU2: Booted secondary processor
[    0.120000] CPU2: thread -1, cpu 2, socket 10, mpidr 80000a02
[    0.120000] CPU2: Unknown IPI message 0x1
[    0.130000] CPU3: Booted secondary processor
[    0.150000] CPU3: thread -1, cpu 3, socket 10, mpidr 80000a03
[    0.150000] CPU3: Unknown IPI message 0x1
[    0.150000] Brought up 4 CPUs
[    0.150000] SMP: Total of 4 processors activated (7969.17 BogoMIPS).
[    0.155000] dummy:
[    0.155000] NET: Registered protocol family 16
[    0.160000] DMA: preallocated 256 KiB pool for atomic coherent allocations
[    0.165000] hw-breakpoint: found 5 (+1 reserved) breakpoint and 1 watchpoint registers.
[    0.165000] hw-breakpoint: maximum watchpoint size is 4 bytes.
[    0.165000] S3C Power Management, Copyright 2004 Simtec Electronics
[    0.165000] EXYNOS4x12 PMU Initialize
[    0.170000] EXYNOS: Initializing architecture
[    0.175000] bio: create slab at 0
[    0.180000] hdmi_5v: 5000 mV
[    0.180000] usbcore: registered new interface driver usbfs
[    0.180000] usbcore: registered new interface driver hub
[    0.180000] usbcore: registered new device driver usb
[    0.180000] s3c-i2c s3c2440-i2c.0: slave address 0x10
[    0.180000] s3c-i2c s3c2440-i2c.0: bus frequency set to 97 KHz
[    0.180000] max77686 0-0009: device found
[    0.180000] max77686 0-0009: irq is not specified
[    0.185000] LDO1 VDD_ALIVE: 1000 mV
[    0.185000] LDO2 VDDQ_M1_1V8: 1800 mV
[    0.190000] LDO3 VDDQ_AUD_1V8: 1800 mV
[    0.190000] LDO4 VDDQ_MMC2_2V8: 2800 mV
[    0.195000] LDO5 VDDQ_MMC1_1V8: 1800 mV
[    0.195000] LDO6 VDD10_MPLL_1V0: 1000 mV
[    0.200000] LDO7 VDD10_EPLL_1V0: 1000 mV
[    0.205000] LDO8 VDD10_MIPI_1V0: 1000 mV
[    0.205000] LDO9 VT_CORE_1V0: 1000 mV
[    0.210000] LDO10 VDD18_MIPI_1V8: 1800 mV
[    0.210000] vdd_ldo11 range: 1900 mV
[    0.215000] LDO12 VDD33_UOTG_3V3: 3300 mV
[    0.215000] LDO13 VDD18_MIPIHSI_1V8: 1800 mV
[    0.220000] vdd_ldo14 range: 1900 mV
[    0.225000] LDO15 VDD10_OTG: 1000 mV
[    0.225000] LDO16 VDD18_HSIC: 1800 mV
[    0.230000] LDO17 VDDQ_CAM_1V8: 1800 mV
[    0.230000] LDO18 VDDQ_ISP_1V8: 1800 mV
[    0.230000] LDO19 VT_CAM_1V8: 1800 mV
[    0.235000] LDO20 EMMC_IO_1V8: 1900 mV
[    0.235000] LDO21 TFLASH_2V8: 3300 mV
[    0.240000] LDO22: 3300 mV
[    0.240000] LDO23 VDD_TOUCH_2V8: 2800 mV
[    0.245000] LDO24 VDD_TOUCHLED_3V3: 3300 mV
[    0.245000] LDO25 VDDQ_LCD_1V8: 1800 mV
[    0.250000] LDO26 VDD_MOTOR_3V0: 3000 mV
[    0.250000] vdd_mif range: 800 <--> 1050 mV at 1000 mV
[    0.250000] vdd_arm range: 800 <--> 1350 mV at 1100 mV
[    0.255000] vdd_int range: 800 <--> 1150 mV at 1000 mV
[    0.255000] vdd_g3d range: 850 <--> 1200 mV at 1000 mV
[    0.255000] BUCK5 VDDQ_CKEM1_2: 1200 mV
[    0.260000] BUCK6 1V35: 1350 mV
[    0.265000] BUCK7 2V0: 2000 mV
[    0.265000] BUCK8 3V3: 3300 mV
[    0.270000] BUCK9 1V2: 1200 mV
[    0.270000] s3c-i2c s3c2440-i2c.0: i2c-0: S3C I2C adapter
[    0.270000] s3c-i2c s3c2440-i2c.1: slave address 0x10
[    0.270000] s3c-i2c s3c2440-i2c.1: bus frequency set to 97 KHz
[    0.270000] s3c-i2c s3c2440-i2c.1: i2c-1: S3C I2C adapter
[    0.270000] s3c-i2c s3c2440-i2c.3: slave address 0x10
[    0.270000] s3c-i2c s3c2440-i2c.3: bus frequency set to 97 KHz
[    0.270000] s3c-i2c s3c2440-i2c.3: i2c-3: S3C I2C adapter
[    0.270000] s3c-i2c s3c2440-i2c.7: slave address 0x10
[    0.270000] s3c-i2c s3c2440-i2c.7: bus frequency set to 97 KHz
[    0.270000] s3c-i2c s3c2440-i2c.7: i2c-7: S3C I2C adapter
[    0.270000] s3c-i2c s3c2440-hdmiphy-i2c: slave address 0x10
[    0.270000] s3c-i2c s3c2440-hdmiphy-i2c: bus frequency set to 97 KHz
[    0.270000] s3c-i2c s3c2440-hdmiphy-i2c: i2c-8: S3C I2C adapter
[    0.270000] Linux video capture interface: v2.00
[    0.270000] Advanced Linux Sound Architecture Driver Version 1.0.25.
[    0.270000] cfg80211: Calling CRDA to update world regulatory domain
[    0.270000] Switching to clocksource mct-frc
[    0.280000] NET: Registered protocol family 2
[    0.280000] TCP established hash table entries: 131072 (order: 8, 1048576 bytes)
[    0.280000] TCP bind hash table entries: 65536 (order: 8, 1572864 bytes)
[    0.280000] TCP: Hash tables configured (established 131072 bind 65536)
[    0.285000] TCP: reno registered
[    0.285000] UDP hash table entries: 512 (order: 3, 32768 bytes)
[    0.285000] UDP-Lite hash table entries: 512 (order: 3, 32768 bytes)
[    0.285000] NET: Registered protocol family 1
[    0.285000] bounce pool size: 64 pages
[    0.295000] msgmni has been set to 1459
[    0.295000] io scheduler noop registered
[    0.295000] io scheduler deadline registered
[    0.295000] io scheduler cfq registered (default)
[    0.295000] start plist test
[    0.300000] end plist test
[    0.300000] s3c-fb exynos4-fb.0: start latency exceeded, new value 750 ns
[    0.300000] s3c-fb exynos4-fb.0: state restore latency exceeded, new value 35500 ns
[    0.320000] Console: switching to colour frame buffer device 170x48
[    0.330000] s3c-fb exynos4-fb.0: window 0: fb
[    0.335000] dma-pl330 dma-pl330.0: Loaded driver for PL330 DMAC-267056
[    0.335000] dma-pl330 dma-pl330.0:     DBUFF-32x4bytes Num_Chans-8 Num_Peri-32 Num_Events-32
[    0.340000] dma-pl330 dma-pl330.1: Loaded driver for PL330 DMAC-267056
[    0.340000] dma-pl330 dma-pl330.1:     DBUFF-32x4bytes Num_Chans-8 Num_Peri-32 Num_Events-32
[    0.345000] dma-pl330 dma-pl330.2: Loaded driver for PL330 DMAC-267056
[    0.345000] dma-pl330 dma-pl330.2:     DBUFF-64x8bytes Num_Chans-8 Num_Peri-1 Num_Events-32
[    0.405000] Serial: 8250/16550 driver, 4 ports, IRQ sharing disabled
[    0.410000] exynos4210-uart.0: ttySAC0 at MMIO 0x13800000 (irq = 84) is a S3C6400/10
[    0.410000] exynos4210-uart.1: ttySAC1 at MMIO 0x13810000 (irq = 85) is a S3C6400/10
[    1.280000] console [ttySAC1] enabled
[    1.285000] exynos4210-uart.2: ttySAC2 at MMIO 0x13820000 (irq = 86) is a S3C6400/10
[    1.295000] exynos4210-uart.3: ttySAC3 at MMIO 0x13830000 (irq = 87) is a S3C6400/10
[    1.310000] brd: module loaded
[    1.315000] loop: module loaded
[    1.320000] ehci_hcd: USB 2.0 'Enhanced' Host Controller (EHCI) Driver
[    1.320000] s5p-ehci s5p-ehci: S5P EHCI Host Controller
[    1.325000] s5p-ehci s5p-ehci: new USB bus registered, assigned bus number 1
[    1.335000] s5p-ehci s5p-ehci: irq 102, io mem 0x12580000
[    1.350000] s5p-ehci s5p-ehci: USB 2.0 started, EHCI 1.00
[    1.350000] usb usb1: New USB device found, idVendor=1d6b, idProduct=0002
[    1.355000] usb usb1: New USB device strings: Mfr=3, Product=2, SerialNumber=1
[    1.365000] usb usb1: Product: S5P EHCI Host Controller
[    1.370000] usb usb1: Manufacturer: Linux 3.6.0-rc1 ehci_hcd
[    1.375000] usb usb1: SerialNumber: s5p-ehci
[    1.380000] hub 1-0:1.0: USB hub found
[    1.385000] hub 1-0:1.0: 3 ports detected
[    1.385000] ohci_hcd: USB 1.1 'Open' Host Controller (OHCI) Driver
[    1.395000] exynos-ohci exynos-ohci: Already power on PHY
[    1.400000] exynos-ohci exynos-ohci: EXYNOS OHCI Host Controller
[    1.405000] exynos-ohci exynos-ohci: new USB bus registered, assigned bus number 2
[    1.410000] exynos-ohci exynos-ohci: irq 102, io mem 0x12590000
[    1.475000] usb usb2: New USB device found, idVendor=1d6b, idProduct=0001
[    1.480000] usb usb2: New USB device strings: Mfr=3, Product=2, SerialNumber=1
[    1.490000] usb usb2: Product: EXYNOS OHCI Host Controller
[    1.495000] usb usb2: Manufacturer: Linux 3.6.0-rc1 ohci_hcd
[    1.500000] usb usb2: SerialNumber: exynos-ohci
[    1.505000] hub 2-0:1.0: USB hub found
[    1.505000] hub 2-0:1.0: 3 ports detected
[    1.510000] usb3503: USB HUB driver init
[    1.515000] usb3503: usb3503_probe:375
[    1.520000] usb3503: usb3503_set_mode: mode = 1
[    1.630000] usb3503: usb3503_register_write: reg: e7 data: 3 write failed
[    1.630000] usb3503: reg_write: write E7, req:03, val:00
[    1.635000] usb3503: SP_ILOCK write fail err = -111
[    1.640000] usb3503: usb3503_probe: probed on  hub mode
[    1.645000] i2c-core: driver [usb3503] using legacy suspend method
[    1.655000] i2c-core: driver [usb3503] using legacy resume method
[    1.660000] s3c-rtc s3c64xx-rtc: rtc disabled, re-enabling
[    1.665000] s3c-rtc s3c64xx-rtc: rtc core: registered s3c as rtc0
[    1.670000] s5p-hdmiphy 8-0038: probe successful
[    1.685000] s5p-hdmi exynos4-hdmi: probe successful
[    1.690000] Samsung TV Mixer driver, (c) 2010-2011 Samsung Electronics Co., Ltd.
[    1.695000] s5p-mixer s5p-mixer: probe start
[    1.700000] s5p-mixer s5p-mixer: resources acquired
[    1.705000] s5p-mixer s5p-mixer: added output 'S5P HDMI connector' from module 's5p-hdmi'
[    1.710000] s5p-mixer s5p-mixer: module s5p-sdo is missing
[    1.715000] s5p-mixer s5p-mixer: registered layer graph0 as /dev/video0
[    1.725000] fb1: registered frame buffer emulation for /dev/video0
[    1.730000] s5p-mixer s5p-mixer: registered layer graph1 as /dev/video1
[    1.735000] fb2: registered frame buffer emulation for /dev/video1
[    1.745000] s5p-mixer s5p-mixer: registered layer video0 as /dev/video2
[    1.750000] fb3: registered frame buffer emulation for /dev/video2
[    1.755000] s5p-mixer s5p-mixer: probe successful
[    1.760000] sdhci: Secure Digital Host Controller Interface driver
[    1.765000] sdhci: Copyright(c) Pierre Ossman
[    1.770000] s3c-sdhci exynos4-sdhci.2: clock source 2: mmc_busclk.2 (88888888 Hz)
[    1.780000] mmc0: no vmmc regulator found
[    1.810000] mmc0: SDHCI controller on samsung-hsmmc [exynos4-sdhci.2] using ADMA
[    1.810000] s3c-sdhci exynos4-sdhci.3: clock source 2: mmc_busclk.2 (88888888 Hz)
[    1.820000] mmc1: no vmmc regulator found
[    1.850000] mmc0: new high speed SDHC card at address b368
[    1.855000] usb 1-2: new high-speed USB device number 2 using s5p-ehci
[    1.860000] mmc1: SDHCI controller on samsung-hsmmc [exynos4-sdhci.3] using ADMA
[    1.870000] mmcblk0: mmc0:b368 00000 7.51 GiB
[    1.870000] usbcore: registered new interface driver usbhid
[    1.870000] usbhid: USB HID core driver
[    1.870000] TCP: cubic registered
[    1.870000] NET: Registered protocol family 17
[    1.870000] NET: Registered protocol family 15
[    1.870000] NET: Registered protocol family 35
[    1.900000] VFP support v0.3: implementor 41 architecture 3 part 30 variant 9 rev 4
[    1.900000]  mmcblk0: p1 p2 p3
[    1.910000] Registering SWP/SWPB emulation handler
[    1.915000] vdd_g3d range: incomplete constraints, leaving on
[    1.920000] LDO25 VDDQ_LCD_1V8: incomplete constraints, leaving on
[    1.925000] s3c-rtc s3c64xx-rtc: setting system clock to 2012-08-07 08:30:44 UTC (1344328244)
[    1.935000] ALSA device list:
[    1.935000]   No soundcards found.
[    1.940000] Waiting 2sec before mounting root device...
[    1.990000] usb 1-2: New USB device found, idVendor=0424, idProduct=3503
[    1.990000] usb 1-2: New USB device strings: Mfr=0, Product=0, SerialNumber=0
[    2.000000] hub 1-2:1.0: USB hub found
[    2.005000] hub 1-2:1.0: 3 ports detected
[    2.295000] usb 1-2.1: new high-speed USB device number 3 using s5p-ehci
[    2.400000] usb 1-2.1: New USB device found, idVendor=0424, idProduct=9514
[    2.400000] usb 1-2.1: New USB device strings: Mfr=0, Product=0, SerialNumber=0
[    2.410000] hub 1-2.1:1.0: USB hub found
[    2.415000] hub 1-2.1:1.0: 5 ports detected
[    2.705000] usb 1-2.1.1: new high-speed USB device number 4 using s5p-ehci
[    2.810000] usb 1-2.1.1: New USB device found, idVendor=0424, idProduct=ec00
[    2.810000] usb 1-2.1.1: New USB device strings: Mfr=0, Product=0, SerialNumber=0
[    2.910000] usb 1-2.1.3: new low-speed USB device number 5 using s5p-ehci
[    3.005000] usb 1-2.1.3: New USB device found, idVendor=15d9, idProduct=0a4c
[    3.010000] usb 1-2.1.3: New USB device strings: Mfr=0, Product=1, SerialNumber=0
[    3.020000] usb 1-2.1.3: Product:  USB OPTICAL MOUSE
[    3.025000] input:  USB OPTICAL MOUSE as /devices/platform/s5p-ehci/usb1/1-2/1-2.1/1-2.1.3/1-2.1.3:1.0/input/input0
[    3.035000] hid-generic 0003:15D9:0A4C.0001: input,hidraw0: USB HID v1.11 Mouse [ USB OPTICAL MOUSE] on usb-s5p-ehci-2.1.3/input0
[    3.130000] usb 1-2.1.5: new low-speed USB device number 6 using s5p-ehci
[    3.250000] usb 1-2.1.5: New USB device found, idVendor=04d9, idProduct=1203
[    3.255000] usb 1-2.1.5: New USB device strings: Mfr=0, Product=0, SerialNumber=0
[    3.275000] input: HID 04d9:1203 as /devices/platform/s5p-ehci/usb1/1-2/1-2.1/1-2.1.5/1-2.1.5:1.0/input/input1
[    3.280000] hid-generic 0003:04D9:1203.0002: input,hidraw1: USB HID v1.11 Keyboard [HID 04d9:1203] on usb-s5p-ehci-2.1.5/input0
[    3.310000] input: HID 04d9:1203 as /devices/platform/s5p-ehci/usb1/1-2/1-2.1/1-2.1.5/1-2.1.5:1.1/input/input2
[    3.315000] hid-generic 0003:04D9:1203.0003: input,hidraw2: USB HID v1.11 Device [HID 04d9:1203] on usb-s5p-ehci-2.1.5/input1
[   12.310000] EXT4-fs (mmcblk0p3): 4 orphan inodes deleted
[   12.310000] EXT4-fs (mmcblk0p3): recovery complete
[   13.685000] EXT4-fs (mmcblk0p3): mounted filesystem with ordered data mode. Opts: (null)
[   13.690000] VFS: Mounted root (ext4 filesystem) on device 179:3.
[   13.695000] Freeing init memory: 156K
[   21.075000] s3c-hsotg s3c-hsotg: Failed to get supply 'vusb_d': -517
[   21.080000] s3c-hsotg s3c-hsotg: failed to request supplies: -517
[   21.585000] init: Failed to create pty - disabling logging for job
[   21.605000] init: Failed to create pty - disabling logging for job
[   21.695000] init: Failed to create pty - disabling logging for job
[   21.710000] init: Failed to create pty - disabling logging for job
[   21.895000] s3c-hsotg s3c-hsotg: Failed to get supply 'vusb_d': -517
[   21.900000] s3c-hsotg s3c-hsotg: failed to request supplies: -517
[   22.505000] init: Failed to create pty - disabling logging for job
[   22.795000] init: Failed to create pty - disabling logging for job
[   22.815000] init: Failed to create pty - disabling logging for job
[   22.820000] init: Failed to create pty - disabling logging for job
[   23.275000] init: Failed to create pty - disabling logging for job
[   23.295000] init: Failed to create pty - disabling logging for job
[   23.305000] init: Failed to create pty - disabling logging for job
[   23.310000] init: Failed to create pty - disabling logging for job
[   23.320000] init: Failed to create pty - disabling logging for job
[   23.325000] init: Failed to create pty - disabling logging for job

[   23.345000] init: Failed to create pty - disabling logging for job
[   23.405000] init: Failed to create pty - disabling logging for job
[   23.410000] init: Failed to create pty - disabling logging for job
[   23.425000] init: Failed to create pty - disabling logging for job
[   23.430000] init: Failed to create pty - disabling logging for job
[   23.435000] init: Failed to create pty - disabling logging for job
[   23.445000] init: Failed to create pty - disabling logging for job
[   23.450000] init: Failed to create pty - disabling logging for job
[   23.455000] init: Failed to create pty - disabling logging for job
[   23.460000] init: Failed to create pty - disabling logging for job
[   23.475000] init: Failed to create pty - disabling logging for job
[   23.495000] init: Failed to create pty - disabling logging for job
[   23.820000] init: Failed to create pty - disabling logging for job
[   23.840000] init: Failed to create pty - disabling logging for job
Last login: Tue Aug  7 07:54:18 UTC 2012 on tty1
Welcome to Linaro 12.07 (GNU/Linux 3.6.0-rc1 armv7l)

* Documentation:  https://wiki.linaro.org/

106 packages can be updated.
20 updates are security updates.

root@linaro-ubuntu-desktop:~#
Yes!
There are many points to reduce the booting time.
Let’s find how to improve it!
We’ve implemented and tested below features.
– Linux Kernel 3.6-rc1 with gcc 4.7.1 Linaro toolchain
– SMP driven Quad-Core processing
– PMIC device driver
– USB 2.0 High-speed Host driver for Exynos-4412 HSIC interface
– Ethernet + USB Hub device driver
– LCD display driver
– HDMI display driver (Very early version and it may have HDMI 1.4a compatibility issues with some monitors)
Known issues.
– Audio codec driver is not ported (We will implement this within couple of weeks)
– eMMC device driver is not ported (We will implement this within couple of weeks)
– Clock control driver is not ported (We will change the default clock from 1Ghz to 1.5Ghz soon)
– 3D HW-GPU X11 driver is not ready (This may need couple of months)
– Power-off (Power off function of Ubuntu GUI is not working. There is no way to power off except for unplugging DC plug. OTL)
– WiFi module is not working with Ubuntu GUI. (Command line of Wireless-tools may work)
– Many other issues
This WiKi describes how to build it and how to use pre-built image for SD-card.
http://dev.odroid.com/projects/odroid-xq/#s-3.2
You can download the pre-built images from this bit-torrent.
bit-torrent Ubuntu-ODROIDX
There are two different pre-built images.
#1. Image file for LCD display
#2. Image file for HDMI display
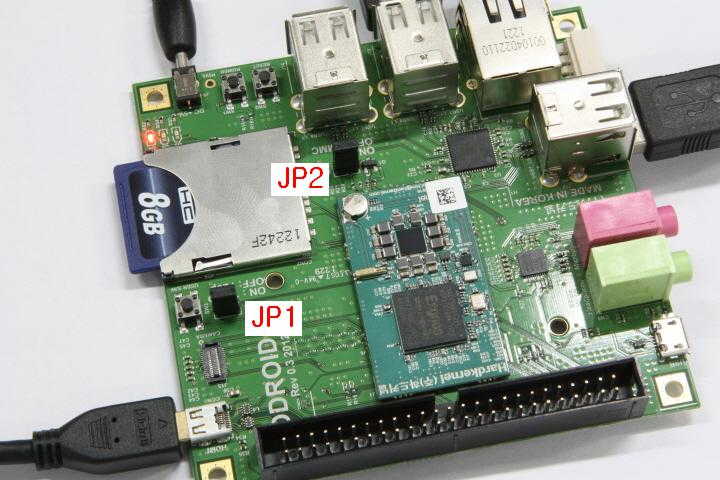
Please note this version doesn’t support eMMC. So you must plug JP2-jumper.
If your HDMI monitor supports only 720p, you must unplug JP1-jumper. If your monitor supports 1080p, plug JP1-jumper.
We need to implement automatic detection function in future.
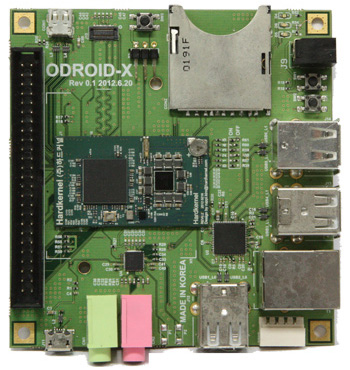
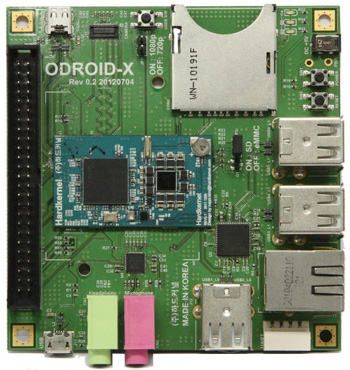
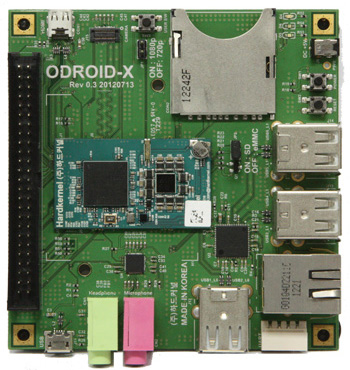
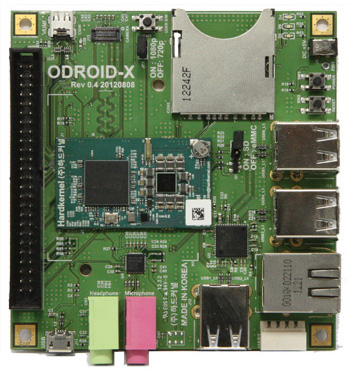
Refer below picture to know where is JP1 & JP2.

 English